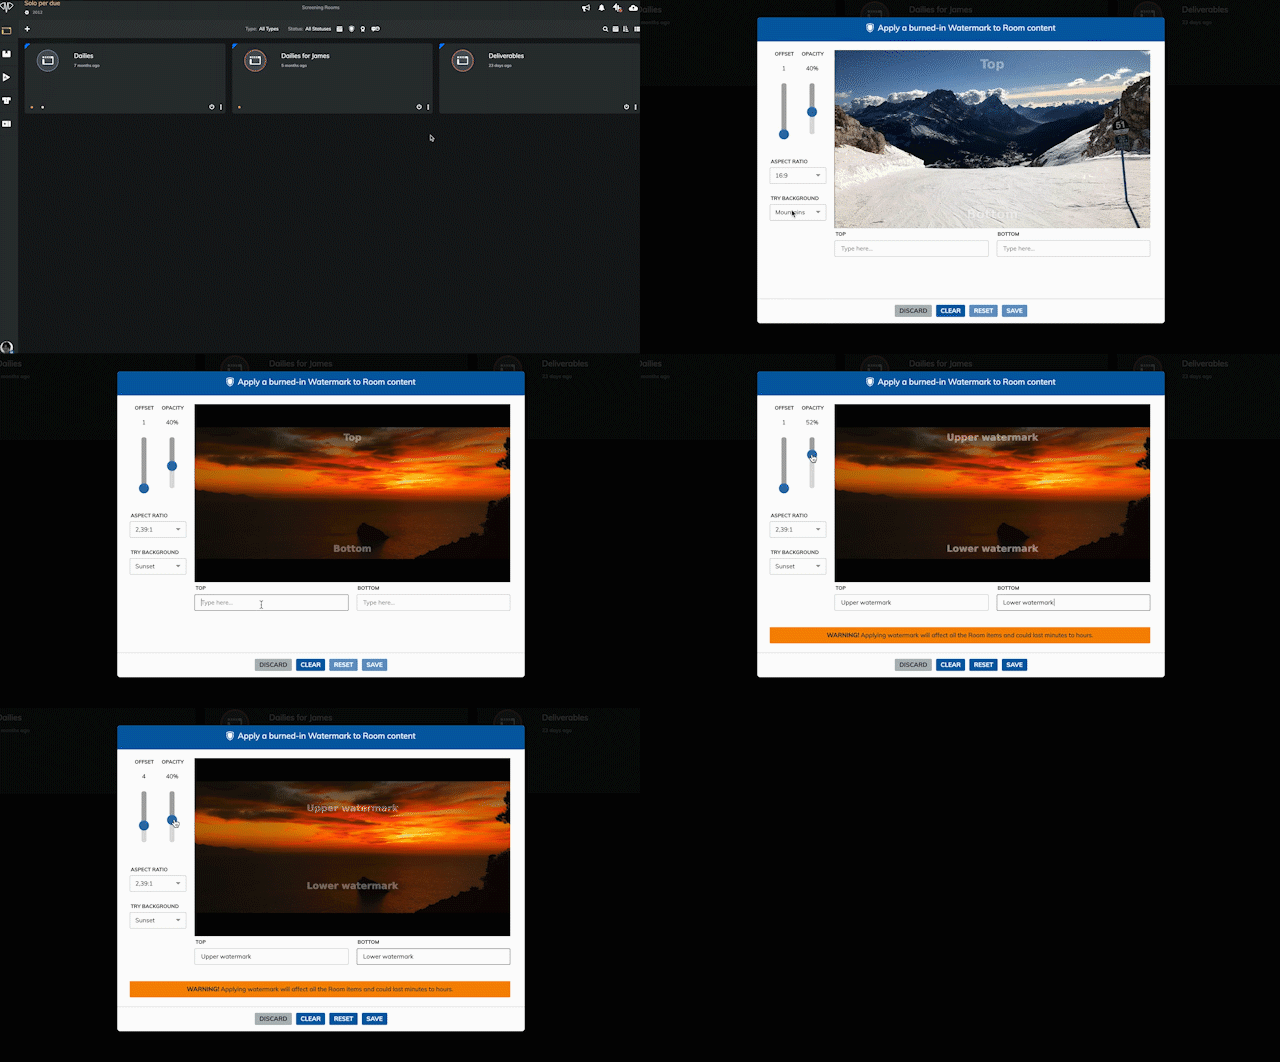
18 Feb Tip: need to add a watermark?
In Mnemonica, each Screening Room can apply a specific burned-in watermark to all its videos and stills.
Our watermark tool includes two free-text fields (max 50 chars each), which can be adjusted in opacity and offset. Text size is auto-adaptive, meaning that short texts may result in bigger font sizes than longer texts.
To apply the watermark, Mnemonica will re-encode all the Screening Room’s content creating an alternate version of the proxy files. The process could last from seconds to hours, depending on the Room’s content. Nonetheless, removing the watermark is instantaneous but not undoable. We suggest trying it on short clips before applying it to a whole set.
How to access the watermark window
- Click on the options icon ( ⵗ ) on the Room’s card in the Project’s dashboard, and select Watermark.
- Click on the watermark icon (
 ) on the right of the toolbar when in a Screening Room.
 - Click on the watermark icon (
 ) on the header of a Room detail in the Admission Control.

Serial watermarking
Our watermark is super powerful if used in tandem with Alias Rooms. In fact, a single upload can create as many watermarked versions as there are Alias Rooms of a Master Room—a brilliant workflow to automate routine tasks and distribute protected content among different audiences.
Please refer to these articles from our User Guide to learn more:


